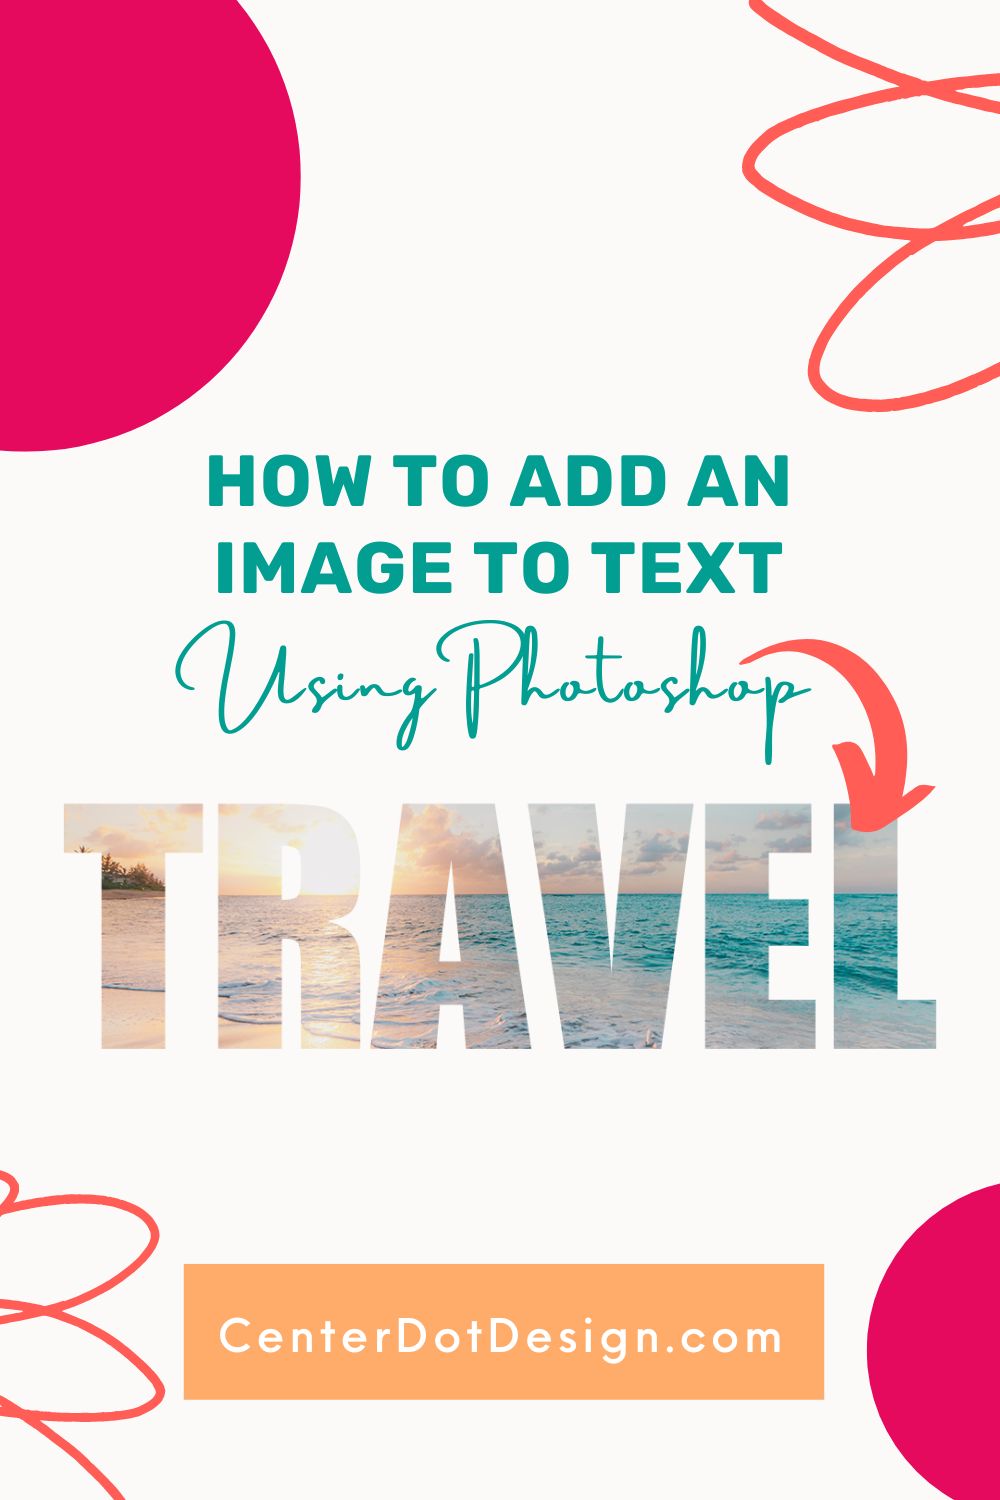
The best way to create text out of a photo or other image is to use a clipping mask. This three step method is not only easy, but is non-destructive, allowing both the text and image to be changed without having to redo the mask. Because of this, clipping masks are great for scalable designs.

Step 1: Create your text layer

- Select the Text tool, designated by the T icon in the toolbar
- Click where you’d like like to add text
- Type your text
- From the Character panel (A| icon), pick your font, adjust letter spacing, and other text settings.
(If your character panel is not showing in Photoshop, go to the Window menu and click Character.)
Step 2: Add you image layer
- Go to File > Place Linked…
- Select your photo file
- Resize the photo to the size of the letter (doesn’t have to be perfect as you can adjust later).
- Hit the Enter key to commit the size change and embed your photo
Step 3: Turn on the clipping mask

With the photo layer selected, go to Layer > Create clipping mask (can also right-click on the photo layer or use keyboard shortcut Option + CMD + G). The clipped layer will have a downward arrow icon on the layer panel to show it has a clipping mask.
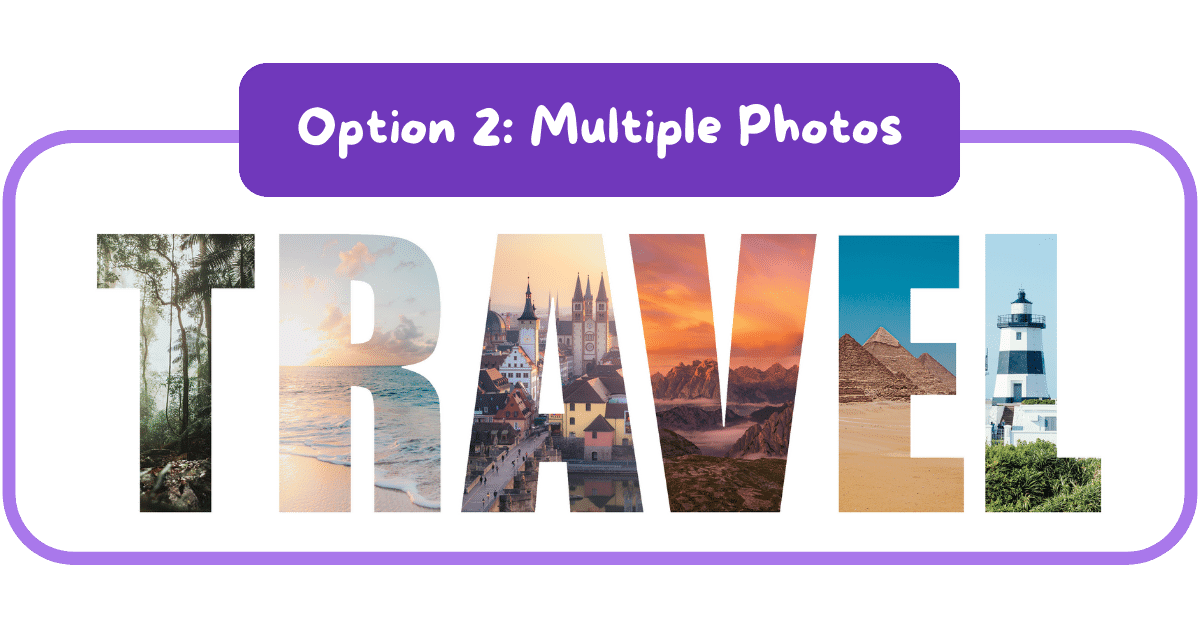
Adding separate images for each letter
Clipping multiple image layers will clip them all to the bottom text layer, as long as you don’t have any unclipped layers in between, but this also means that layers may overlap onto neighboring letters. So if you want to add a different photo to each letter, you will want to use layer masks instead. Here’s how to use layer masks to make a photo the shape of a letter:
- Create your text layer using the Text tool
- Add a photo for the first letter via File > Place linked…
- Resize the photo to the size of the letter
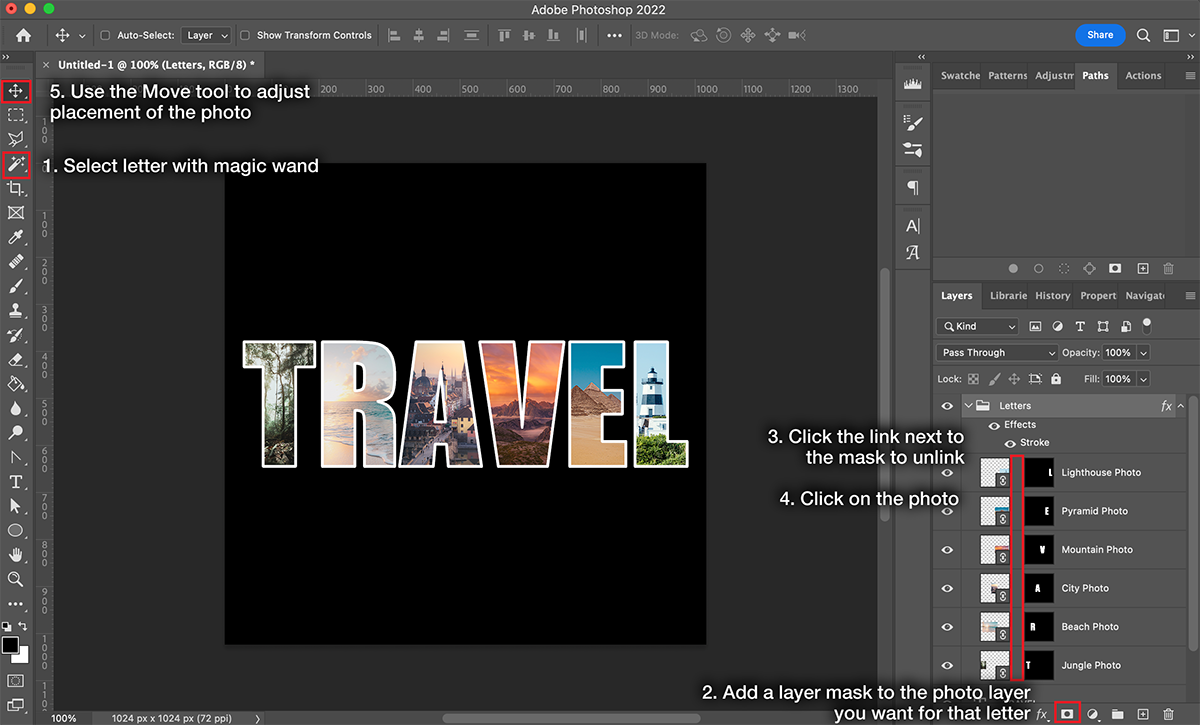
- Click the Eye icon next to the photo layer to hide it for now
- Select the Magic Wand tool and make sure the Contiguous and Sample All Layers settings are enabled (checked)
- Click on the first letter with the Magic Wand to select it
- Click on the photo layer in the Layers panel
- Click the Eye icon next to the photo layer to make it visible again
- Click the Add Layer Mask icon on the bottom of the Layers panel OR go to Layer > Layer Mask > Reveal Selection
- To adjust the placement of the photo within in the letter:
- Click the Link icon between the layer thumbnail and layer mask on on the photo layer to unlink the mask. This enables you to move the photo without moving the letter-shaped mask.
- Click on the layer thumbnail on the photo layer
- Click the Move tool
- Click and drag your photo as needed.
- You can also resize the photo via Edit > Free Transform (CMD +T)
- Repeat steps 1-10 for each letter
After all of your letters have photos, you can apply effects to all of them at once by adding them to a Group and applying layer effects to the group, such as the white outline (stroke) shown in the example below.
Credits
- Beach Photo by Sean Oulashin on Unsplash
- Jungle Photo by Justin Clark on Unsplash
- Cityscape Photo by Daniel Seßler on Unsplash
- Mountain Photo by Daniel Mirlea on Unsplash
- Pyramid Photo by 2H Media on Unsplash
- Lighthouse Photo by You-Chen Hsu on Unsplash